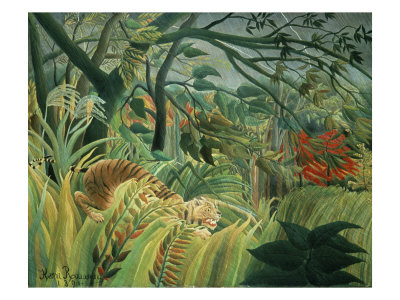
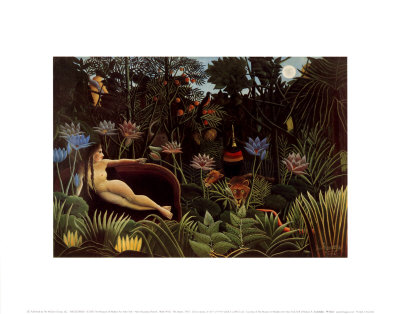
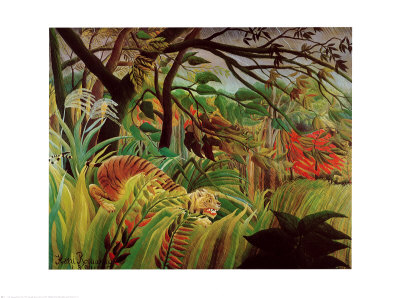
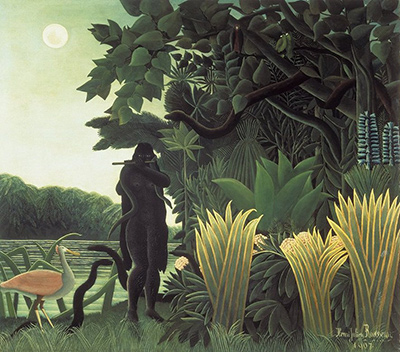
Capturing the elusive quality of moonlight requires more than simply painting dark shapes; it demands a deep understanding of how light behaves in the absence of direct sunlight. Just as Henri Rousseau once transformed quiet forests into surreal dreamscapes, you can infuse your own landscapes with a magical, ethereal glow that feels both mysterious and alive. This guide explores the techniques necessary to translate that specific silver hue and its unique interactions with the world onto the canvas.
Understanding the Physics of Silver Light
Before touching a brush, it is crucial to grasp that moonlight is not a source of illumination in the traditional sense. It is reflected sunlight filtered through the atmosphere, which makes it incredibly soft, cool, and low in saturation. Unlike the harsh, warm yellow of a setting sun, moonlight possesses a distinct blue-violet undertone that casts long, gentle shadows. To paint this authentically, you must avoid the temptation to simply mix blue and white paint; instead, think in terms of luminosity and contrast. The moon itself is a bright, white orb, but its effect on the ground is a diffuse, shimmering mist. The key lies in observing how the light touches surfaces, creating a veil of silver that separates the illuminated areas from the deep, velvety darkness of the night.
Mastering the Shadows
In a landscape under moonlight, the shadows are not merely the absence of light; they are the primary source of texture and depth. Because the light source is low and distant, shadows stretch out dramatically, often elongating tree trunks or draping across rocky outcrops. These shadows should be painted with a rich, dark tone, but not an absolute black. Pure black can look flat and muddy on canvas. Instead, use a very dark mixture of burnt umber, ultramarine, or even a touch of purple to suggest the coolness of the night. The shadows should feel heavy and absorbing, contrasting sharply with the delicate highlights. By keeping the shadows dark and undefined in their edges, you allow the viewer's eye to fill in the gaps, creating a sense of infinite space and mystery.
The Technique of Luminosity
Once you have established the dark shadows, you must introduce the silver light. This is often the most challenging part of the process. The light should appear to emanate from the moon, spilling over the nearest objects first. You can achieve this by using a very pale, cool grey or a thin wash of titanium white mixed with a tiny amount of ultramarine blue. Do not lay this paint heavily; use a dry brush or a clean, barely damp brush to stroke the surface, creating a sense of vibration or shimmer. This technique mimics the way moonlight dances on wet grass or glints off water. The highlights should be small, distinct points rather than broad, flat patches, as if the light is piercing through gaps in branches or leaves.
Painting the Water
Water is perhaps the most effective medium for reflecting moonlight. In a landscape painting, a still lake or a calm river can turn into a mirror, breaking the darkness with fragmented reflections of the silver sky. When painting these surfaces, do not simply paint a line of white. Instead, use horizontal strokes of varying opacity to suggest ripples. The center of the reflection where the moon is directly overhead should be the brightest, while the edges fade into the darker tones of the surrounding banks. You can also incorporate the reflection of the moon's shape, though it will be distorted by the movement of the water, appearing as a smudged, glowing orb. This element adds a crucial sense of depth and movement to an otherwise static scene.
Choosing the Right Palette
To successfully capture this nocturnal atmosphere, your color choices must be strictly limited to prevent the painting from becoming too dark or too muddy. Rely heavily on cool tones such as cobalt blue, cerulean, viridian, and pale greys. Avoid warm colors like ochre, sienna, or cadmium yellow, as they will introduce an unwanted golden hue that contradicts the nature of moonlight. The palette should feel cool, crisp, and atmospheric. You may use a touch of complementary color, such as a hint of warm orange or pink in the very far distance (perhaps on a distant hill or window) to create a subtle contrast that makes the cool blues of the foreground pop. However, keep these warm accents minimal and distant, serving only to enhance the luminosity of the moon rather than competing with it.
Remember, the goal is not photorealism but rather the evocation of a feeling—a quiet, magical moment frozen in time. By focusing on the interplay between the deep shadows and the shimmering highlights, and by adhering to a cool, restricted palette, you can create landscapes that possess the same dreamlike quality found in the works of master painters who have mastered the art of the night.
Here are five essential steps to ensure your moonlit landscape achieves that perfect balance of darkness and light:
- Sketch the composition first, paying close attention to the placement of the moon and the direction of the light rays.
- Block in your darkest shadows first, ensuring they are rich and cool rather than flat black.
- Layer your silver highlights sparingly, using thin, translucent washes to create a sense of vibration.
- Reflect the moonlight in your water features using broken, shimmering strokes rather than solid lines.
- Step back frequently to check the overall value range, ensuring the contrast between light and dark remains striking.