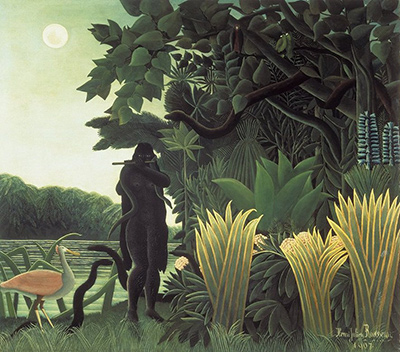
The traditional image of printmaking often conjures visions of smooth ink on paper, yet the true spirit of art lies in breaking boundaries. By incorporating unconventional materials like weathered wood, rough fabrics, or even found paper scraps, artists can transform a standard print into a tactile narrative that breathes life into the page. This guide explores how to master these non-traditional mediums to create unique prints that resonate with the soul of naive art.
Preparing Your Unusual Surface
Before a single drop of ink is applied, the foundation of your work must be established. Whether you are working with a slab of reclaimed pine or a swatch of denim, preparation is key to achieving a successful transfer. The texture of the material dictates the final outcome, so understanding the grain, weave, or bark patterns of your substrate is the first step. For wood, sanding down rough edges while preserving the natural character ensures that the ink flows smoothly without getting trapped in splinters. Fabric, on the other hand, requires a delicate approach; excessive washing can ruin the dye, so test your chosen material on a scrap piece first.
One critical aspect of working with these surfaces is the adhesive phase. Standard gels often fail to adhere properly to fabric fibers or the porous grain of wood. You will need to apply a specific medium designed to bond ink to non-paper surfaces. This step ensures that when you press your print down, the image transfers clearly rather than smearing or flaking off. Take your time here, as a weak bond can ruin an otherwise beautiful composition.
Selecting the Right Ink and Tools
Not all inks are created equal when it involves strange materials. Oil-based inks are generally more forgiving and provide a richer, more opaque coverage, which is excellent for heavy textures like burlap or thick bark. However, they require more cleanup and drying time. For lighter, more delicate fabrics, water-based inks might be preferable, as they allow the underlying texture of the material to show through subtly.
Your tools must also adapt to the medium. While a brayer (roller) works wonders on flat surfaces, handling fabric often requires a palette knife or a soft sponge to apply ink directly onto the weave. This technique allows you to build up layers of ink, creating depth and dimension that a simple roller cannot achieve. If you are using wood, a palette knife becomes your primary tool, allowing you to carve away excess ink and create sharp, defined lines that mimic the natural imperfections of the wood grain.
Techniques for Layering and Stamping
The magic of printmaking with unconventional materials often happens in the layering process. Start with a base coat of ink to establish your background tone. As you add subsequent layers, you are building a narrative, much like a story told in pictures. When working with fabric, try stamping the ink onto the material first, then pressing it onto your final paper. This method, known as reverse printing, can create startling visual effects where the ink sits differently on the fabric compared to the paper, highlighting the contrast between the two mediums.
For wood, the technique of "carving" the ink directly onto the surface can yield results similar to woodblock printing. You can use a knife to scrape away the ink in specific patterns before pressing the paper. This adds an element of spontaneity and unpredictability, much like the intuitive style found in naive art. Each layer adds complexity, forcing you to make decisions on the fly rather than following a rigid plan.
Troubleshooting Common Issues
Every artist encounters hurdles, and working with non-paper materials is no exception. A common problem is ink bleeding through thick fabrics or getting lost in deep wood crevices. To prevent bleeding, you can use a barrier spray or apply a thin layer of gesso to seal the surface before inking. For wood, ensure that the surface is dry and free of moisture, as damp wood can warp and cause uneven ink distribution.
Another frequent issue is the difficulty in achieving a clean lift when the paper is too thin or the ink is too heavy. Practice on different paper weights to find what works best for your specific material. Thicker cardstock or heavy watercolor paper often holds the image better than standard printer paper. Additionally, be mindful of the pressure you apply; too little pressure results in a faint image, while too much can tear delicate fabrics or crush the wood.
The Aesthetic of Imperfection
Finally, remember that the goal of using unconventional materials is often to embrace imperfection. The roughness of the wood, the mottled nature of the fabric dye, and the irregularities in the grain all contribute to a sense of authenticity and humanity. In the world of naive art, this "imperfect" quality is celebrated rather than corrected. By stepping outside the confines of the traditional canvas and paper, you invite the viewer to touch, feel, and engage with your work on a deeper level. The print becomes an object of desire not just for its image, but for the story hidden within its texture.
To ensure a successful workflow with these unique substrates, consider following this structured approach:
- Clean the surface thoroughly to remove dust or loose particles.
- Apply your chosen bonding medium evenly across the entire area.
- Test the ink viscosity on a small section to gauge coverage.
- Press the paper firmly but gently to avoid damaging the material.
- Allow the print to dry completely before handling or framing.